
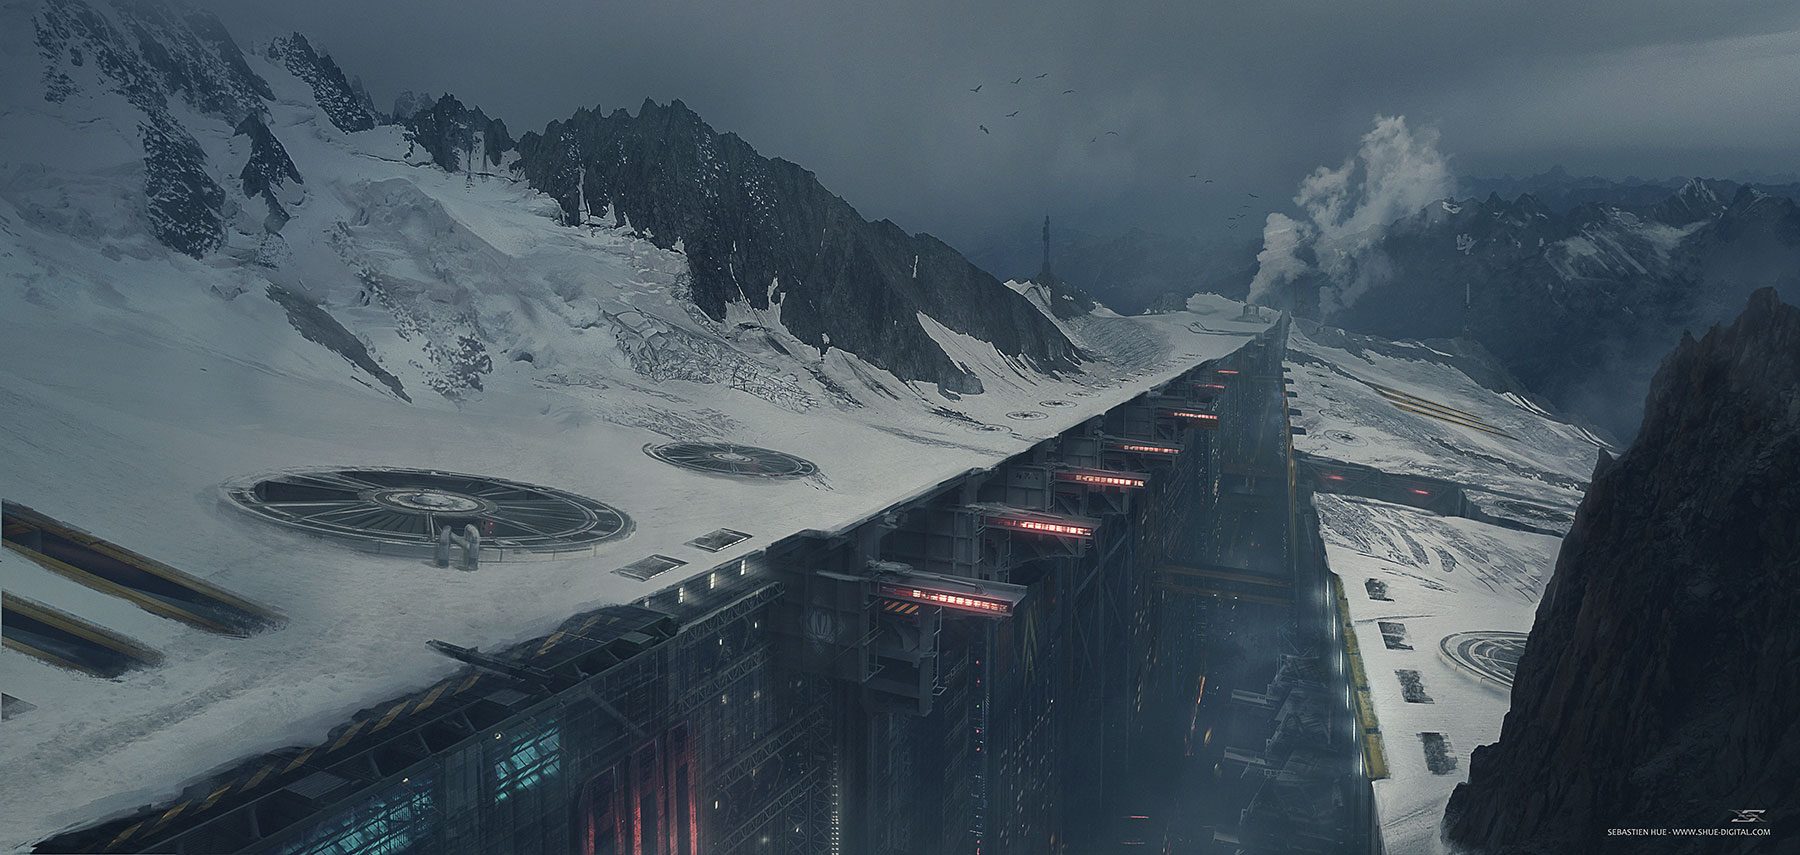
Sebastien Hue has shared with us a walkthrough of his latest Illustration, Artificial Glacier. Enjoy the creative process and the different steps with the before / after of each steps, and play with the mouse on each steps to watch the difference.
IAMAG Master Classes : Get into the creative process of the best artists
Step #1
[image-comparator title=”” left=”https://www.iamag.co/wp-content/uploads/2016/12/2.jpg” right=”https://www.iamag.co/wp-content/uploads/2016/12/1.jpg” width=”100%” classes=”hover”][/image-comparator]
Original Plate from Canvas Extension with painting and other stock –
Slide mouse above to see changes
Step #2
[image-comparator title=”” left=”https://www.iamag.co/wp-content/uploads/2016/12/3.jpg” right=”https://www.iamag.co/wp-content/uploads/2016/12/4.jpg” width=”100%” classes=”hover”][/image-comparator]
Replace rough painting with texture and snow painting in the back and Perspective lines and painting of the canyon according to this perspective following the terrain curves
Slide mouse above to see changes
Step #3
[image-comparator title=”” left=”https://www.iamag.co/wp-content/uploads/2016/12/5.jpg” right=”https://www.iamag.co/wp-content/uploads/2016/12/6.jpg” width=”100%” classes=”hover”][/image-comparator]
Apply some textures in proper perspective and more textures blending with the back values
Slide mouse above to see changes
Step #4
[image-comparator title=”” left=”https://www.iamag.co/wp-content/uploads/2016/12/7.jpg” right=”https://www.iamag.co/wp-content/uploads/2016/12/8.jpg” width=”100%” classes=”hover”][/image-comparator]
Add more details with photobashing and add elements outside the corridor preferably round shapes to break the linear aspect of your main shape
Slide mouse above to see changes
Step #5
[image-comparator title=”” left=”https://www.iamag.co/wp-content/uploads/2016/12/9.jpg” right=”https://www.iamag.co/wp-content/uploads/2016/12/10.jpg” width=”100%” classes=”hover”][/image-comparator]
More photobashing; Add some haze for depth and atmoshpere with lights
Slide mouse above to see changes
Step #6
[image-comparator title=”” left=”https://www.iamag.co/wp-content/uploads/2016/12/11.jpg” right=”https://www.iamag.co/wp-content/uploads/2016/12/12.jpg” width=”100%” classes=”hover”][/image-comparator]
More structures and tone down the canvas with curves filter for more drama, add lights to imply life in there and hase in the very back for more volumetric depth
Slide mouse above to see changes
Step #7
[image-comparator title=”” left=”https://www.iamag.co/wp-content/uploads/2016/12/13.jpg” right=”https://www.iamag.co/wp-content/uploads/2016/12/14.jpg” width=”100%” classes=”hover”][/image-comparator]
Strengthen the lights with contrast and painting and spice up the background with smoke, LookUp adjustment layers for moods and snow painting here and there for more natural transitions
Slide mouse above to see changes
Step #8
[image-comparator title=”” left=”https://www.iamag.co/wp-content/uploads/2016/12/15.jpg” right=”https://www.iamag.co/wp-content/uploads/2016/12/16.jpg” width=”100%” classes=”hover”][/image-comparator]
More moods painted with soft brush and color corrections, final sharpening and contrast adjustment.
Slide mouse above to see changes
All Steps at Glance


