
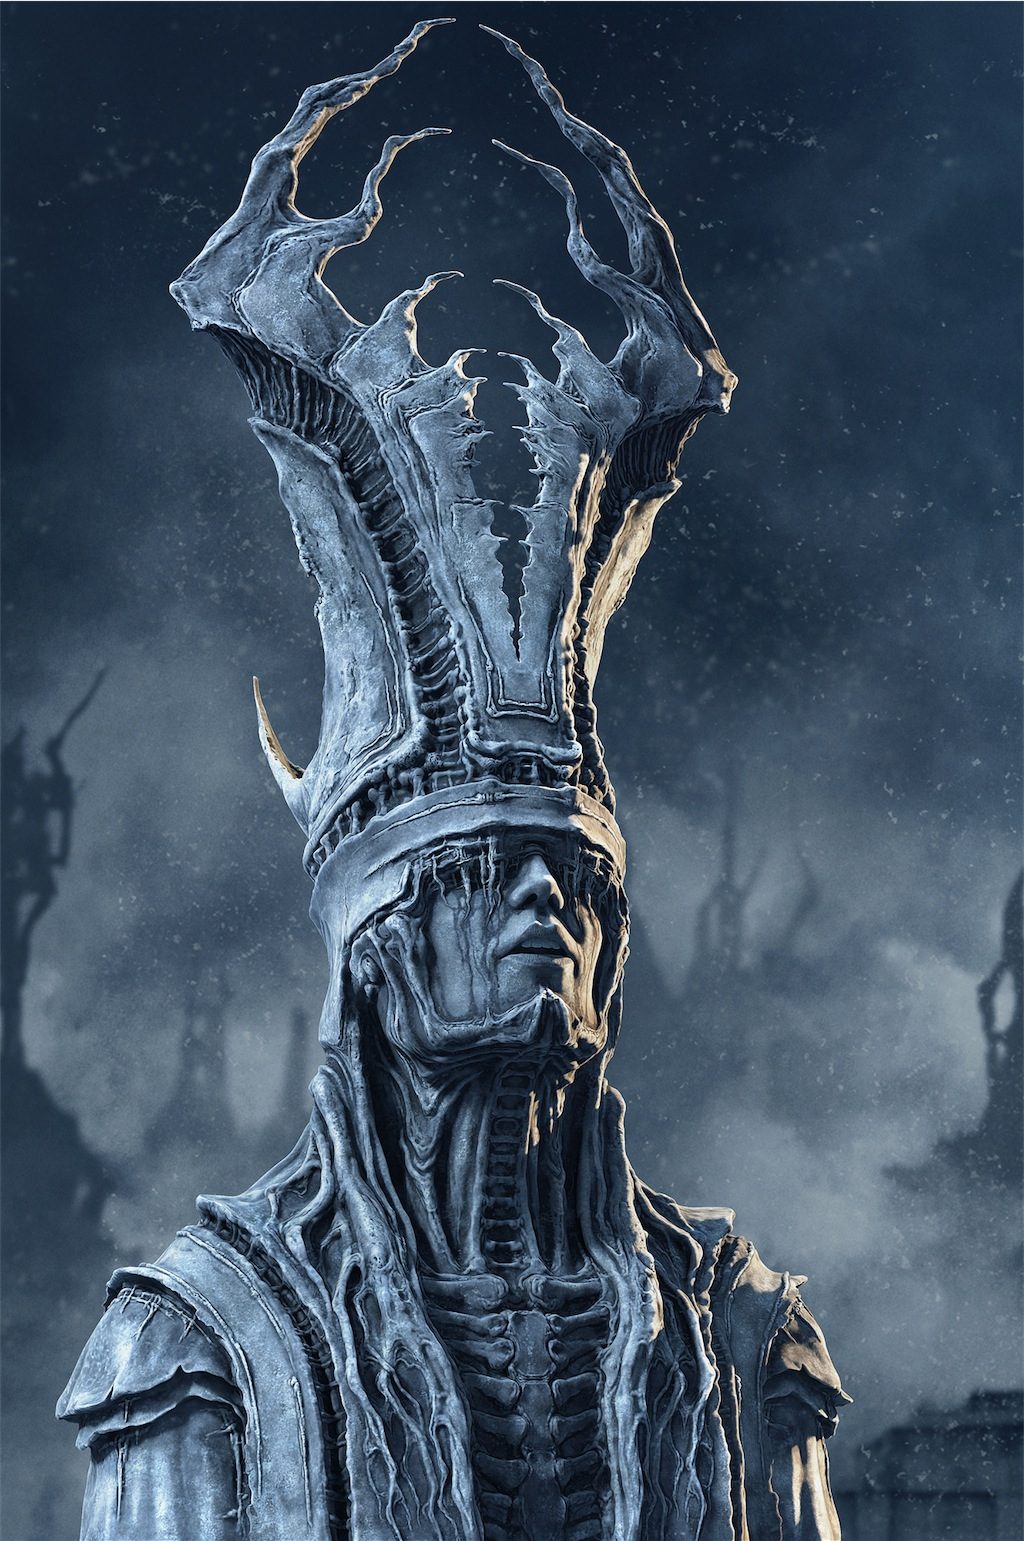
Tomasz Strzalkowski presents a work specially donce for It’s Art magazine, Making of Mysterious Sculpture. Particular objects and the whole scene have been completed with Zbrush. Only the composition has been made in Photoshop. It could be said that the work is the continuation or a reference to my previous work “Mysterious sculpture”, and hence its name is “Mysterious Sculpture2”
IT’S ART Tutorial Members can download the High Resolution of the pictures here [download#165#size] and a text version of the tutorial here : [download#166#size]

Sketch and idea
The idea came up to me, as usually, while I was making some sketches freely. As I mentioned above, I wanted to develop the idea present in “Mysterious sculpture”. I wanted to create a sort of mini-series. What’s more, in the following tutorial I wanted to show how to make such a work using only Zbrush but using it comprehensively. What I mean is using it from modelling, creating your own alphas, which can be used in modelling the scene thanks to texturing, moreover, creating appropriate materials, setting the scene as a whole, choosing the best perspective, lighting to rendering. Only the final composition and colour correction has been made in Photoshop.
Modelling
The most commonly used set of brushes is jest (Fig_001) I use them with different settings but not only them. Those brushes I always have nearby and most of the work I manage to do with only them. However, I don’t limit myself only to that particular set – it all depends on what I need and I always use whatever it takes to achieve my goal. I begin every scene with a very general outline, which means creating basic models. In this case it was a very initial sketch of characters. I had previously made a drawing on a sheet of paper but I decided to do the sketching in Zbrush from the very early stage. The idea for the graphics was clear from the beginning, only the details needed to be worked on more thoroughly. The concepts about the details were changing quite often. I wanted to achieve something that would satisfy me fully, that is why I tried various ways until I felt that that was it. (Fig_002) In this picture I present you all modelling stages one by one. While looking for the appropriate shape I tried to test particular parts of modelling, but I used separate plains for that purpose where I could play with different shapes which I could use later to create alphas and to carve the main object. (Fig_003). In all my works I create all elements myself, for example modelling alphas in Zbrush, which I later use in my further works. Thanks to that I create alpha and brush database. An interesting moment while creating the work came when I was carving the face. Looking at the face you can see the changes which were made. I was faithful to the main idea but I was trying to make it better and better (Fig_04)
Test rendering and looking for a lighting idea
While I was doing the modelling I quite often did test renderings during which I tried not only to check what the model looked like in a particular lighting, but I also tried to find the best lighting or background at that early stage. It has a huge influence on the mood of the work. As I mentioned before, the vision was present from the beginning but I wanted to see what it looks like and be able to do the modelling. Such renderings gave me both an initial picture of the whole work and I could convince myself to particular solutions or reject them. I always hope that the final effect will be better and surprising. (Fig_005)
At one moment it was time to divide the object into two parts but in such a way that the joints would be invisible. It was necessary for further modelling because I needed more polygons as I wanted to achieve more details. What’s more the density of the grid allowed me to texture the object with higher resolution using Spotlight. (Fig_006)


